You’re about to learn a simple, reliable recipe set that uses pantry staples like natural peanut butter, oats, pumpkin, and sweet potato. These options let you bake batches that suit your pup’s taste and your schedule.
Start with three-ingredient mixes or try pumpkin with almond flour for a softer bite. You’ll see clear bake minutes and oven temps—300F for 25–30 minutes, 350F for 15–20 minutes, or 400F for 10–15 minutes—so you can choose soft or crunchy results.
Mix ingredients in a bowl, roll and cut on parchment paper, then transfer each sheet into the oven for even baking.
Storage is easy: keep a small jar at room temp for a week, stash extras in the fridge, or freeze portions for longer shelf life.

Key Takeaways
- Use natural peanut butter (peanuts only) and safe flours like oat or almond for best results.
- Choose bake minutes and temperature based on desired texture: lower temp for chew, higher for crunch.
- Grind oats into oat flour when a finer dough is needed; whole oats work in rustic batches.
- Follow simple prep steps: preheat oven, mix in a bowl, roll, cut, and bake on a parchment-lined baking sheet.
- Store treats on the counter short-term, refrigerate for a week, or freeze for longer convenience.
Why you’ll love baking homemade dog treats today
A few common pantry items can become dozens of tasty bites you’ll reach for all week.
Banana‑peanut butter‑oat snacks use things you already have and freeze beautifully. Keep a big freezer bag and grab one when your pup deserves a reward.
Pumpkin and peanut butter blends stay soft, which helps older dogs chew easily. If you add a glaze, refrigerate glazed batches for best texture and safety.
Sweet potato with peanut and oat flour is wallet-friendly. Small biscuits can cost under $1 CAD for 40–50 pieces—much cheaper than store bags.
- You save money fast and control every ingredient in each recipe.
- Use ripe fruit, a cup of oats, or leftover mash and cut waste.
- Store batches in a container on the counter, in the fridge for longer, or in the freezer for grab‑and‑go rewards.
“Baking once trims prep time and keeps treats ready when you need them.”
Choose safe, wholesome ingredients your pup will love
Focus on clear, safe choices that pack vitamins, fiber, and protein into every bite. Keep your ingredient list short so you can spot allergens or additives quickly.
Natural peanut butter only: pick jars that list peanuts only. Avoid xylitol, added sugars, salt, or extra oils. Pure peanut butter gives protein and healthy fats without risky fillers for your dog.
Flour choices: whole wheat flour or wheat flour work if your pup tolerates grains. If not, blitz oats into oat flour in seconds with a blender for a quick swap. Almond flour yields a tender crumb, but check with your vet before large changes.
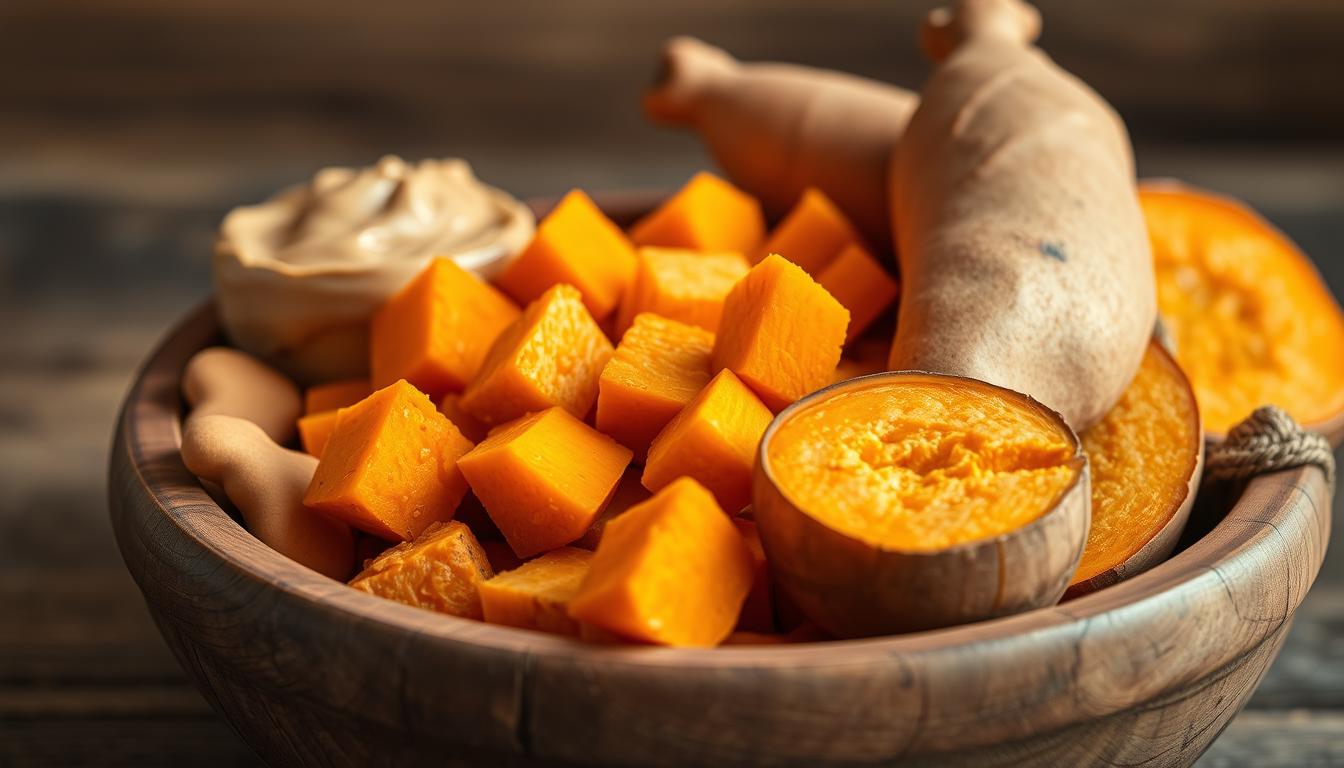
Pumpkin, banana, and sweet potato: use unsweetened pumpkin puree, ripe banana, or cooked mashed sweet potato for moisture, fiber, and vitamins. These add-ins help bind dough without extra sugars.
- If dough seems dry, add a splash of water; if sticky, dust with flour.
- Keep add-ins simple — peanut, pumpkin, banana, sweet potato, and a chosen flour — for safe swaps and easy recipes.
How to Make Healthy Homemade Dog Treats
Get your station set and the process moves smoothly. Start with a clean mixing bowl, a measuring cup, and a baking sheet you will line with parchment paper.
Simple ingredient list and tools
Tools: mixing bowl, measuring cup, a baking sheet, and parchment for easy release and quick cleanup.
Basics: peanut butter, oat or wheat flour, pumpkin or banana, and a cup measurement for wet and dry parts.
Step-by-step: preheat oven, mix dough, roll, and cut
Preheat oven to the temperature your chosen recipe calls for — 300F, 350F, or 400F — so baking starts immediately when the sheet goes in.
Mix wet ingredients in the bowl first, then add flour until a pliable dough forms. If dough gets sticky, dust the surface lightly, wet your hands with cool water, or chill briefly.
Roll on parchment, cut shapes or slice squares, and place each piece on the lined baking sheet with space around it.
Bake minutes and doneness cues
Bake minutes vary: about 25–30 minutes at 300F, 15–20 minutes at 350F, or 10–15 minutes at 400F depending on thickness.
Look for golden brown edges and set centers. Let the treats cool fully on the sheet so they firm up before you store them or offer one to your dog.

Tasty variations to try: peanut butter-banana, pumpkin, and sweet potato
Pick a base—banana, pumpkin, or sweet potato—and build an easy cup‑based dough around it.
Three-ingredient banana-peanut butter-oat
Quick recipe: grind oats into a flour in a blender, mash one ripe banana in a bowl, then stir in peanut butter until a pliable dough forms.
Roll on parchment, cut shapes, and bake at 300F for 25–30 minutes. One small batch yields about 40 cookie pieces.
Pumpkin with almond flour and optional turmeric glaze
Combine pumpkin puree, peanut butter, and almond flour. Add a pinch of cinnamon and turmeric for warmth.
Shape small discs and press a fork criss‑cross on each like a classic cookie. Bake at 350F for 15–20 minutes.
Optional glaze: mix peanut butter, a splash of melted coconut oil, and a pinch of turmeric. Drizzle, let dry, then refrigerate if glazed.
Sweet potato paired with oat or whole wheat flour
Mix mashed sweet potato with peanut butter and either oat flour or whole wheat. Adjust flour until dough is soft but not sticky.
Bake at 400F for 10–15 minutes; thinner pieces need fewer minutes for a crunchy finish, while thicker pieces stay chewy.
- Use whole wheat for a heartier bite or oat flour for a gentler option.
- Dial bake minutes shorter for soft treats and longer for crunchier ones.
- Test a small bowl batch in your oven before scaling up.
| Variation | Main flour | Bake temp | Time (minutes) |
|---|---|---|---|
| Banana‑peanut | Oat flour | 300F | 25–30 |
| Pumpkin‑peanut | Almond flour | 350F | 15–20 |
| Sweet potato‑peanut | Oat or whole wheat | 400F | 10–15 |
Shaping, thickness, and baking tips for perfect treats
Shaping and thickness have the biggest impact on texture, so small changes yield very different results. These quick techniques help you control bake time and final bite every batch.
Handling sticky dough is simple: lightly dust the work surface with flour, wet your hands with cool water, or chill the dough for 10–15 minutes. Roll between sheets of paper or use a silicone mat to prevent sticking.
Aim for 1/4–1/2 inch thickness. Thinner pieces crisp faster; thicker cookies stay soft inside. Smaller cutouts need fewer minutes and cool quicker, which is handy when you need a quick treat.
- Press a fork criss‑cross on peanut butter cookies for a classic look and even centers.
- Space pieces on the baking sheet so hot air circulates and edges brown evenly.
- If dough cracks, knead in a splash of water; if too soft, add a spoon or cup of flour until it holds shape.
- Line baking sheet with parchment paper for easy release and clean up.
Watch for golden brown edges and set centers as your main doneness cue. Let treats cool fully on the sheet so they firm up and lift off cleanly.
Storage and serving: keep treats fresh in a container, fridge, or freezer
Good storage preserves flavor and texture so your pup always gets a great bite. Cool each batch fully on the baking sheet before packing.
Counter vs fridge vs freezer: time frames and best practices
Room temperature: keep a small container for daily use. Banana‑oat pieces last up to one week. Pumpkin or almond flour batches stay fresh about three days on the counter if unglazed.
Fridge: chill moist batches. Banana‑oat can keep up to two weeks, while pumpkin versions stay about one week. Use airtight jars to cut down on odor transfer.
Freezer: freeze extras for two to three months. Lay cookies in a single layer until firm, then move them into dated bags so you pull one treat at a time without thawing the whole lot.
Soft vs crunchy: serve room temp or straight from the freezer
Serving straight from the freezer is a handy way to make softer pieces feel crunchier. Many dogs love the extra snap, and it doubles as a cooling snack on warm days.
- Label bags with date and flavor so you track time and rotate stock.
- Portion by size and calories; use consistent shapes and a cup measure if you count servings.
- When swapping pumpkin and sweet potato batches, offer a small piece first to confirm your dog handles the change well.
Conclusion
With simple pantry items and steady steps, you can bake reliable batches that fit your week.
Use measured cups, mix in a bowl, and set the oven and bake minutes for the texture you want. Try 300F for 25–30 minutes, 350F for 15–20 minutes, or 400F for 10–15 minutes depending on thickness.
Choose whole wheat flour or oat as needed and keep parchment ready to line baking sheet. Shape discs, press a fork for a classic cookie, or cut small squares for quick snacks.
Stick with natural peanut butter and simple add-ins like pumpkin or sweet potato. Store on the counter for short stints, chill in the fridge for one to two weeks, or freeze extra for months.
Follow these steps and you’ll have a dependable homemade dog recipe list that makes your pup sit, wait, and reward happily.
FAQ
Are natural peanut butter and commercial nut spreads both safe for your pup?
Use natural peanut butter that lists only peanuts and maybe salt. Avoid any product with xylitol, added sugars, or hydrogenated oils. Read labels carefully and choose brands like Smucker’s Natural or 365 by Whole Foods Market that list minimal ingredients.
Which flour is best: whole wheat flour, oat flour, or almond flour?
Whole wheat flour gives structure and a nutty flavor and works well for most pups. Oat flour is gentler on sensitive stomachs. Almond flour is richer and higher in fat, so use it sparingly. Pick based on your dog’s digestion and the texture you want.
Can you use pumpkin, banana, or sweet potato in recipes?
Yes. Canned plain pumpkin (not pie filling), mashed ripe banana, and cooked mashed sweet potato add fiber, vitamins, and moisture. They also reduce the need for added fats or water in the dough.
What basic tools and ingredients do you need for baking?
Keep it simple: a mixing bowl, baking sheet, parchment paper, measuring cups, and a rolling surface. Core ingredients are whole wheat or oat flour, natural peanut butter, an egg or pumpkin for binding, and a little water if needed.
How do you mix dough, roll it out, and cut shapes?
Preheat your oven before starting. Combine wet and dry ingredients in a bowl, mix until a firm dough forms, chill briefly if sticky, then roll on a lightly floured surface and cut with cookie cutters or a knife.
What baking time and doneness cues should you watch for?
Bake until edges are golden brown and centers feel set. Small treats often take 10–20 minutes depending on thickness; thicker biscuits may need 20–30 minutes. Let them cool to firm up before serving.
Any quick three-ingredient treat ideas?
Yes—mix mashed banana, natural peanut butter, and oat flour into a dough, roll into balls or press flat, and bake until set. It’s simple, low-fuss, and popular with many pups.
How can you handle sticky dough for rolling and shaping?
Lightly flour your surface and hands, chill the dough for 15–30 minutes, or wet your hands to prevent sticking. You can also press the dough into a baking sheet for no-roll bars.
Should treats be made soft or crunchy, and how do you control texture?
Thickness and bake time control texture: thinner treats and longer baking yield crunch; thicker or slightly underbaked centers stay soft. Use cookie cutters and adjust rolling thickness accordingly.
What are safe ways to store treats at room temperature, in the fridge, or freezer?
Store sealed at room temperature for up to a week. Refrigerate for 2–3 weeks if treats contain fresh ingredients like pumpkin. Freeze portions for up to three months; thaw on the counter or serve straight from the freezer for a cool snack.
Can you add spices like turmeric or extras like apple or oat?
Small amounts of dog-safe spices such as turmeric can be used for variety. Add finely grated apple (no seeds), cooked oats, or shredded sweet potato for extra flavor and nutrients—avoid chocolate, raisins, onion, and salt-heavy ingredients.
What’s the best way to portion treats for training versus rewards?
Cut or bake smaller pieces for training so you can reward often without overfeeding. Reserve larger biscuits as special rewards or longer-lasting chews.

Meu nome é Igor Silva e sou apaixonado por animais desde criança. Dedico meu trabalho a compartilhar informações confiáveis e práticas sobre cuidados, saúde e bem-estar de animais de estimação.