How to Clean Your Dog’s Ears Safely at Home
You’ve probably noticed it: your dog shaking their head, scratching their ears, or giving you that sideways “something’s wrong” look. Or maybe you’re just preparing for routine care—because you know that ear health is as vital as dental or nail care. But the moment you reach for a cotton swab, doubt creeps in. “Am I doing this right? Could I hurt them?”
You’re not alone. Ear cleaning is one of the most misunderstood parts of dog care. Many owners either over-clean (causing irritation) or avoid it entirely (leading to infections). And with so much conflicting advice online—from “just use vinegar!” to “never touch the ears!”—it’s no wonder you’re cautious.
Here’s the truth: cleaning your dog’s ears at home is safe, simple, and essential—when done correctly. And it doesn’t require medical training. Just the right tools, gentle technique, and a little know-how.
In this guide, you’ll learn:
- How often to clean (it’s not weekly for every dog!)
- Which breeds need extra attention
- Step-by-step technique that avoids injury
- Signs of infection that mean “see a vet—now”
- Products that actually work (and which to skip)
No scary jargon. No risky DIY hacks. Just a calm, vet-approved approach that keeps your dog comfortable and infection-free.
Ready to care for those floppy (or pointy!) ears with confidence?
Why Ear Health Is More Important Than You Think
Your dog’s ears aren’t just for hearing—they’re complex, sensitive organs that, when neglected, can lead to chronic pain, hearing loss, and even balance issues.
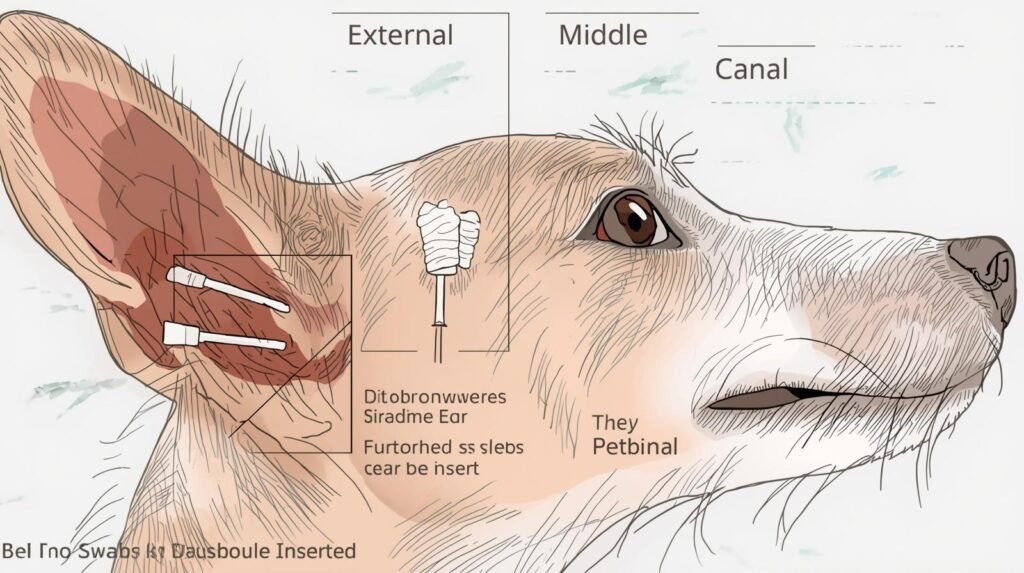
Unlike human ears, most dogs have L-shaped ear canals: a vertical section drops down, then turns horizontally toward the eardrum. This shape traps moisture, wax, and debris—creating a perfect breeding ground for bacteria and yeast.
Dogs with floppy ears (like Basset Hounds, Cocker Spaniels, or Labs) are especially prone because airflow is limited. But even prick-eared breeds (like German Shepherds or Huskies) can develop issues—especially if they swim or have allergies.
Left untreated, minor irritation can escalate to otitis externa (outer ear infection), which causes:
- Redness and swelling
- Foul odor
- Brown, yellow, or bloody discharge
- Head tilting or loss of balance
Worse, repeated infections can damage the ear canal permanently, requiring surgery.
The good news? Prevention is simple. Regular, gentle cleaning removes buildup before it becomes a problem. And it’s far easier (and cheaper!) than treating a full-blown infection.
As Dr. Megan Thompson, a veterinary dermatologist, says: “I see more ear issues from improper cleaning than from lack of cleaning. It’s not if you clean—it’s how.”
So let’s get the “how” right—starting with frequency.
How Often Should You Clean? (It Depends on Your Dog)
Forget the myth that “all dogs need weekly ear cleaning.” The truth is: cleaning too often can do more harm than good.
Over-cleaning strips natural oils, dries out the skin, and causes micro-tears—opening the door to infection. So frequency should be based on your dog’s breed, lifestyle, and health.
High-Risk Dogs (Clean Every 1–2 Weeks):
- Floppy-eared breeds: Cocker Spaniels, Basset Hounds, Beagles
- Swimmers: Labs, Golden Retrievers (water traps in ears)
- Allergy-prone dogs: Frenchies, Westies (allergies = more ear wax)
- Dogs with a history of ear infections
Low-Risk Dogs (Clean Every 4–8 Weeks or As Needed):
- Prick-eared breeds: German Shepherds, Huskies, Chihuahuas
- Indoor-only dogs with no allergies
- Senior dogs with no ear issues
Signs It’s Time to Clean:
- Mild odor (not strong or foul)
- Light brown wax buildup at the entrance
- Occasional head shake after walks
Never clean “just in case.” If ears look and smell clean, leave them alone.
Pro Tip: Check ears during weekly grooming or after baths/swimming. Make it part of your routine—like brushing teeth.
Because prevention isn’t about frequency. It’s about awareness.
Breeds That Need Extra Ear Care (And Why)
Some dogs are born with ears that practically invite trouble. Knowing your breed’s risks helps you stay ahead.
Cocker Spaniels
- Prone to excessive wax production and hair growth in the ear canal
- Clean every 7–10 days; ask your groomer to pluck excess hair
Basset Hounds & Bloodhounds
- Long, droopy ears = no airflow, constant moisture
- Wipe the outer folds daily with a damp cloth
- Clean inside every 10–14 days
Poodles & Shih Tzus
- Hair grows inside the ear canal, trapping debris
- Never pluck yourself—have a groomer or vet do it
- Clean every 2 weeks
French Bulldogs & English Bulldogs
- Narrow ear canals + allergies = perfect storm for yeast
- Use a drying solution after cleaning
- Watch for redness—often the only sign
Swimming Breeds (Labs, Goldens, Spaniels)
- Water = yeast paradise
- Use a veterinarian-recommended drying solution after every swim
- Clean within 24 hours of water exposure
Key Insight: It’s not about the breed alone—it’s about your dog’s individual history. If they’ve had one infection, they’re 3x more likely to get another.
So tailor your care. Your dog’s ears will thank you.
What You’ll Need: Safe Tools and Solutions
Not all ear cleaners are equal. Some are gentle. Others can burn, dry out, or worsen infections.
✅ What Works Best
- Veterinary-formulated ear cleaners: Look for brands like Virbac Epi-Otic, Zymox, or Dechra DermaPet
- Contain drying agents (like propylene glycol)
- Are pH-balanced for dogs
- Are non-stinging (no alcohol or peroxide)
- Cotton gauze or pads: Soft, lint-free, and safe for wiping
- Treats: High-value rewards to build positive association
❌ What to Avoid
- Cotton swabs (Q-tips): Push debris deeper, risk eardrum puncture
- Vinegar, hydrogen peroxide, or alcohol: Too harsh; disrupt natural flora
- Homemade “natural” mixes: Unproven and potentially irritating
- Water alone: Doesn’t break down wax; adds moisture
How to Choose
- For routine cleaning: Use a general cleaner like Epi-Otic
- For dogs with yeast history: Use an enzymatic cleaner like Zymox (contains lactoferrin)
- After swimming: Use a drying solution like Vet’s Best Ear Cleaner
Pro Tip: Test the solution on your skin first. If it stings you, it’ll hurt your dog.
And never use anything labeled “for humans.” Dog ears are far more sensitive.
Because safety starts with what’s in the bottle—not just how you use it.
Step-by-Step Cleaning Technique (That Won’t Hurt)
Cleaning safely isn’t about force—it’s about gentle, controlled movements.
Step 1: Check for Red Flags
Before cleaning, look for:
- Strong odor
- Discharge (yellow, green, bloody)
- Redness or swelling
- Pain when touched
If any are present, stop and call your vet. Cleaning an infected ear spreads the problem.
Step 2: Prepare Your Dog
- Choose a calm time (after a walk, not before meals)
- Let your dog sniff the bottle
- Give a treat for staying still
Step 3: Apply the Solution
- Hold the ear flap up gently
- Fill the ear canal with cleaner (you’ll see it pool at the base)
- Do not insert the tip into the canal
Step 4: Massage the Base
- Gently massage the base of the ear for 20–30 seconds
- You’ll hear a “squishing” sound—that’s wax loosening
Step 5: Let Them Shake
- Release the ear and let your dog shake (stand back!)
- This brings debris to the surface
Step 6: Wipe Away Excess
- Use a cotton gauze pad to wipe the outer ear and folds
- Never probe deep—clean only what you can see
Remember: Less is more. If your dog resists, do one ear today, the other tomorrow.
Because trust is built in small, calm moments—not forced sessions.
When to See a Vet (And What Not to Do at Home)
Some signs mean stop cleaning and call your vet immediately:
- Foul, yeasty, or pus-like odor
- Discharge that’s yellow, green, or bloody
- Swelling or extreme redness
- Head tilting, circling, or loss of balance
- Pain or aggression when ears are touched
These indicate infection, mites, or even a ruptured eardrum. Cleaning at home can worsen it.
❌ What NOT to Do
- Don’t use leftover medication from a previous infection
- Don’t insert anything into the ear canal (even “soft” tools)
- Don’t ignore it—ear infections rarely resolve on their own
✅ What to Do
- Call your vet for an exam
- Ask for a cytology test (to identify bacteria vs. yeast)
- Follow the full treatment course—even if symptoms improve
One client, Sarah, shared: “I kept cleaning my Lab’s ears, thinking it was dirty. Turned out he had a yeast infection. The vet said my cleaning spread it deeper. Now I check first, clean only if healthy.”
Because sometimes, the most caring thing you can do is step back and seek help.
Desensitizing a Dog Who Hates Ear Touching
If your dog growls, ducks, or runs at the sight of an ear cleaner, never force it. Fear leads to bites—and missed care.
Instead, rebuild trust with this 3-week desensitization plan:
Week 1: Positive Association
- Pet around the ears (not in them) during calm moments
- Give a treat immediately after
- End before your dog moves away
Week 2: Introduce the Bottle
- Let your dog sniff the cleaner (uncapped)
- Touch the ear flap gently with your hand, then reward
- Wipe the very outer edge with a dry gauze
Week 3: Simulate Cleaning
- Lift the ear flap, apply a drop of solution, massage, and reward
- Don’t wipe—just let them shake and treat
For extreme fear:
- Work with a fear-free certified trainer
- Use a lick mat with peanut butter during cleaning
- Clean one ear per session
Real Story: Mark’s rescue terrier used to snap at ear touches. After 4 weeks of desensitization, he now lies down and offers his ears. “It wasn’t about cleaning. It was about proving I wouldn’t hurt him.”
Because ears are vulnerable. And trust is earned—one gentle touch at a time.
Products That Actually Work (And Which to Skip)
With so many options, it’s hard to know what’s safe. Here’s the truth:
✅ Vet-Recommended Cleaners
- Virbac Epi-Otic Advanced: Best for routine cleaning; dries fast, non-irritating
- Zymox Otic: Contains enzymes that break down yeast/bacteria (great for prone dogs)
- Dechra DermaPet Ear Cleaner: Alcohol-free, with ceramides to soothe skin
❌ Overhyped or Risky
- Apple cider vinegar mixes: Too acidic; can burn inflamed skin
- Hydrogen peroxide: Damages healthy tissue
- “Natural” herbal drops: No scientific backing; may cause allergies
Accessory Tips
- Use cotton gauze rolls (not pads—they shed lint)
- Keep a dedicated ear towel in your grooming kit
- Store cleaner at room temperature (cold liquid startles dogs)
Remember: The best product is the one your dog tolerates—and that’s vet-approved. Skip the DIY. Your dog’s ears are worth it.
Long-Term Ear Health: Prevention, Monitoring, and Care
Consistency beats intensity. Here’s how to keep ears healthy for life:
- Clean only when needed—not on a rigid schedule
- Dry ears thoroughly after baths or swims
- Trim hair around ear openings (but never inside—leave to pros)
- Manage allergies (a major cause of ear issues)
- Schedule annual vet checks—ask for an ear exam
Seasonal Tips:
- Summer: Watch for grass seeds in ears (common in hiking dogs)
- Winter: Dry ears after rain or snow exposure
- Allergy season: Increase monitoring (spring/fall for many dogs)
And always pair ear checks with positive experiences: a treat, a chin scratch, a quiet moment.
Because healthy ears aren’t just about cleanliness. They’re about comfort, balance, and joy—so your dog can hear your voice, the birds, and their own happy barks for years to come.
Real Stories: From Infection to Prevention
Case 1: Bella, the Cocker Spaniel
Bella had chronic ear infections. Her owner, Lisa, cleaned weekly with vinegar—making it worse.
“The vet switched us to Zymox and taught me to clean only when needed. No infections in 18 months.”
Key: Right product + right frequency.
Case 2: Max, the Rescue Mix
Max would bite at ear touches. His owner, Tom, used the 3-week desensitization plan.
“Now he gets a lick mat during cleaning. It’s our calm time together.”
Key: Patience + positive association.
Case 3: Luna, the Senior Lab
Luna developed balance issues. Her owner thought it was age—turned out to be a deep ear infection.
“The vet said early treatment saved her hearing. Now I check ears weekly.”
Key: Vigilance saves long-term health.
These dogs aren’t “easy.” They’re loved—and their owners chose care over convenience.
As Lisa put it: “Her ears are her lifeline to the world. I won’t take that for granted.”
And that’s the heart of it.
Conclusion
Let’s recap what we’ve covered:
- Ear health prevents pain, infection, and hearing loss
- Clean only when needed—not on a fixed schedule
- High-risk breeds (floppy ears, swimmers, allergy-prone) need extra care
- Use vet-approved cleaners—never vinegar or peroxide
- Follow the 6-step technique: check, apply, massage, shake, wipe, reward
- Stop and see a vet if you see discharge, odor, or pain
- Desensitize fearful dogs—never force
- Prevention is ongoing: dry after water, manage allergies, monitor seasonally
- Real dogs (like Bella, Max, and Luna) prove it’s possible
Cleaning your dog’s ears isn’t about perfection. It’s about presence, patience, and prevention.
So start small. Be gentle. Celebrate progress—not perfection.
Your dog doesn’t need you to be an expert. They just need you to be careful, consistent, and kind.
💬 Your Turn:
Have you struggled with ear cleaning? What worked—or didn’t? Share your story in the comments below. Together, we can keep every dog’s ears healthy and happy.

My name is Igor Silva and I’ve been passionate about animals since childhood. I dedicate my work to sharing reliable, practical information about pet care, health, and well-being.